Import Numbers For Twilio - US & International Users
Custom Bring-Your-Own-Numbers:
BEFORE YOU START: Please ensure you are NOT on a TRIAL Twilio account, This will NOT WORK on TRIAL Twilio.
This is a comprehensive guide on importing numbers into the system for your AI assistants to use for both inbound and outbound calling with as little involvement from your end as possible. In exchange for that back half reassurance, we need you to do some work upfront for us. It’s not super technical and I will walk you through it A - Z, 110% with all the information you need.
It’s a one-and-done thing so just take a breather and let's do some techy stuff real quick.
In this guide, we will show you how to add your telephony (Twilio or others) to the AI for calling. We are going to use Elastic SIP Trunking - what is elastic SIP trunking? Great question. IDK actually… I’m just kidding. Elastic SIP Trunking is a service offered by cloud communications platforms that enables organizations to connect their existing PBX (Private Branch Exchange) or VoIP (Voice over IP) infrastructure to the Public Switched Telephone Network (PSTN) over the internet using the SIP (Session Initiation Protocol). Layman's terms - connect AI to phone.
This is the way to integrate with your telephony provider that supports elastic SIP trunking. You will need to set up a SIP trunking and configure your number to point to it, and then import that number to the AI system.
We will use Twilio as an example here. You can use other telephony providers that support elastic SIP trunking as well.
In this context, the elastic SIP trunking is used to connect our VoIP with PSTN so that your AI can make and receive calls.
Let’s get started ⬇️
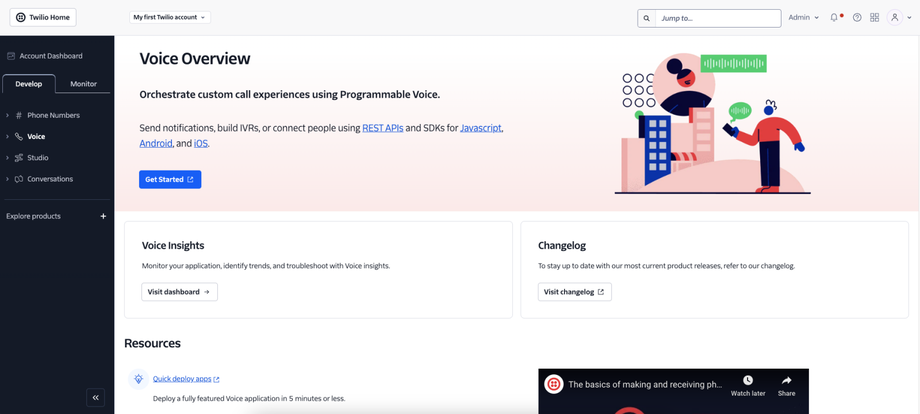
1. Navigate to twilio.com (console.twilio.com) and you should see a similar page to the screenshot below:
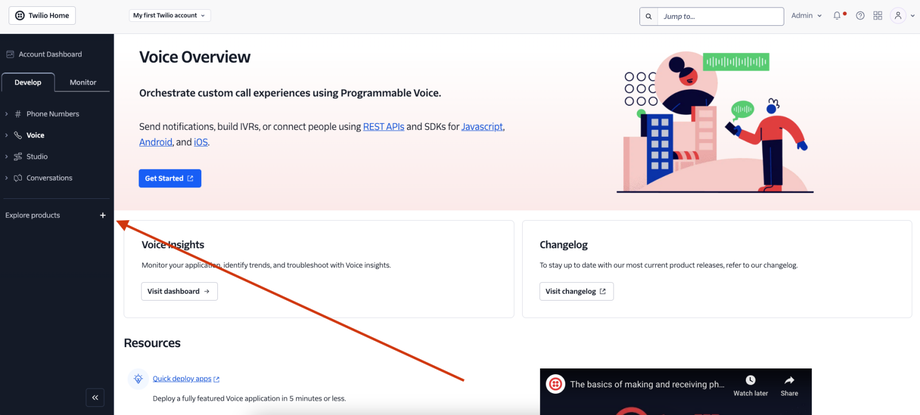
2. Navigate and click on “Explore products”:
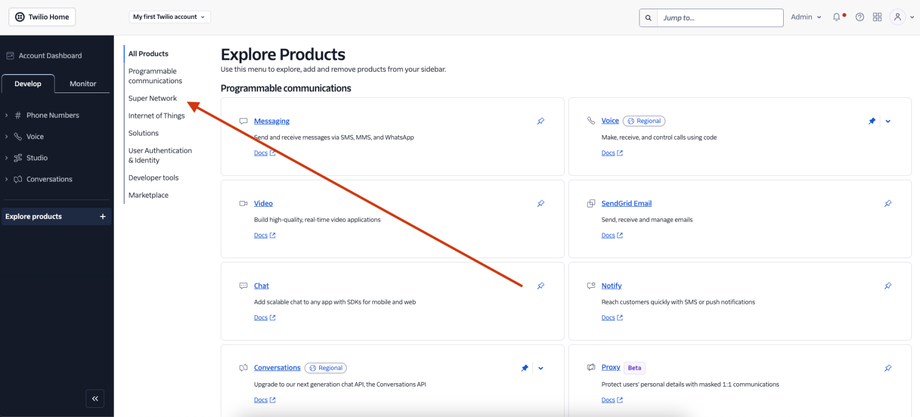
3. Next, on the menu for products - we need to click on “Super Network”:
4. We need to click on “Elastic SIP Trunking” - this is how we will be able to automate inbound and outbound calls on your behalf: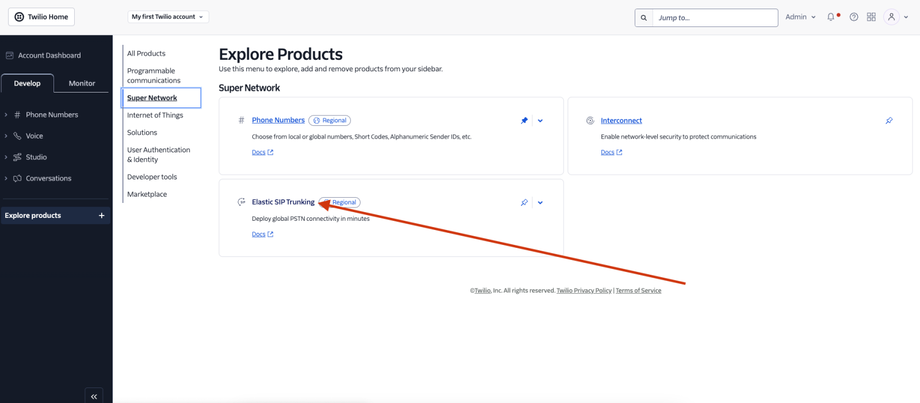
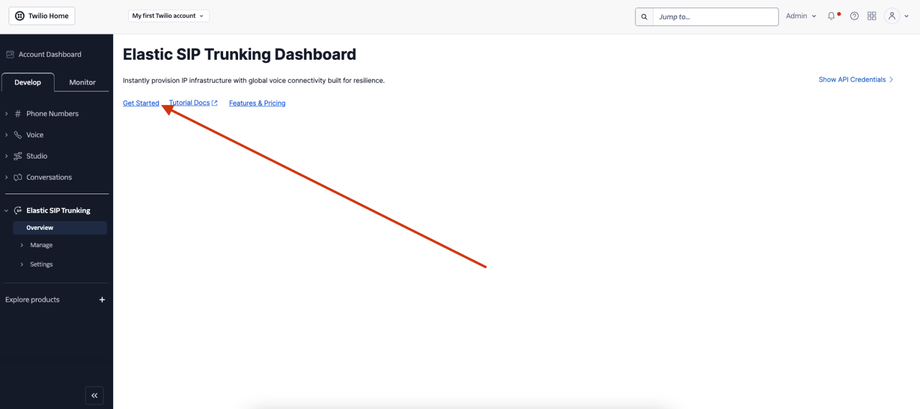
5. Now, we should be at the “Elastic SIP Trunking Dashboard”. We are getting close - hang in there. Ok, so now click “Get Started” right under the main header on this page:
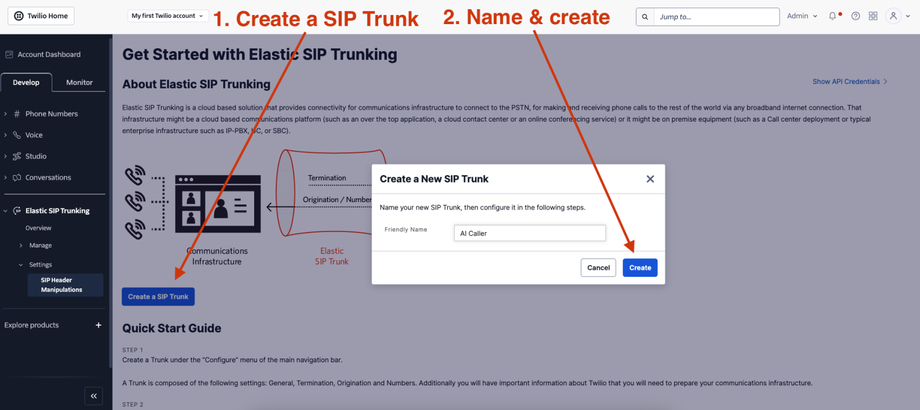
6. Click on “Create a SIP Trunk”, then give it a name - I just called mine “AI Calling”. Then create:
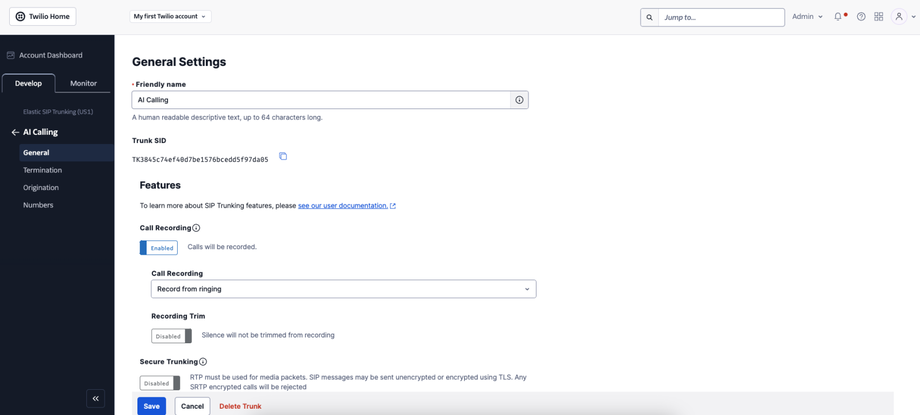
7. Let’s toggle some general settings to make everyone’s life a little bit easier. Ok, I enabled Call Recording here (Record from ringing), I enabled Call Transfer (SIP REFER), and I set my Caller ID for the Transfer Target to be the caller ID as transferee. Then I clicked the blue save button in the bottom left:
8. Stay with me here. If you got this far, you’re doing good. It’s about to get a little fun though so just take a breather and let's do this. Ok, so now we need to set up termination (this is for outbound). Click on Termination over on the navigation menu to the far left (in screenshot). The termination SIP URI here is like… really important. We would use it in later steps so save this for later: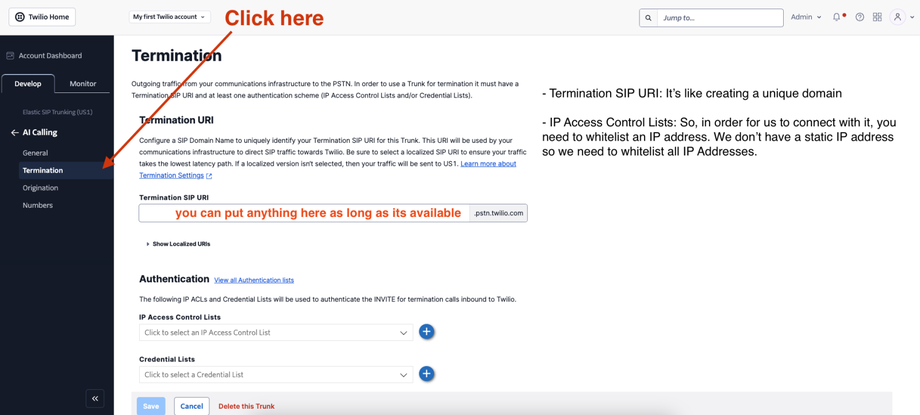
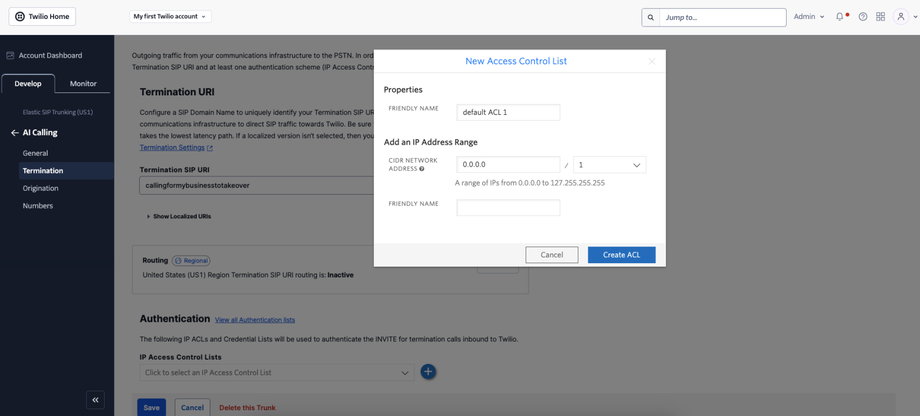
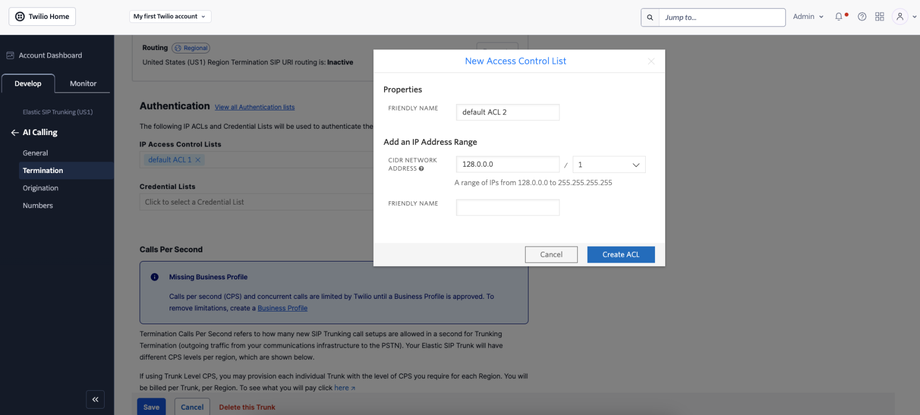
9. Ok, got it? Saved it? Good to go? Let's do the next thing. Yes it will say inactive - we are about to activate it. We need to whitelist some IP addresses. If you don’t know what that means - it's just saying let us be able to access it. Now - For your elastic SIP trunk to accept our outbound request, you need to whitelist some IP addresses. Which ones? All of them. Currently, our SIP server does not have a static IP, so you need to whitelist all the IP addresses in the range like following:
- Click on the “+” button next to IP Access Control Lists under Authentication (its like right below what we just did)
- Create the first list:
Friendly name: default ACL 1
Address: 0.0.0.0 / 1
- Create the second list:
Friendly name: default ACL 2
Address: 128.0.0.0 / 1
- Click the blue save button in the bottom to the left 🙂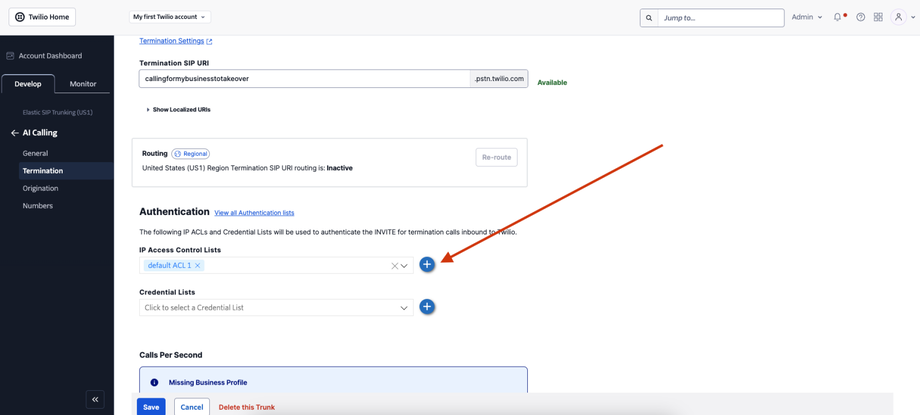
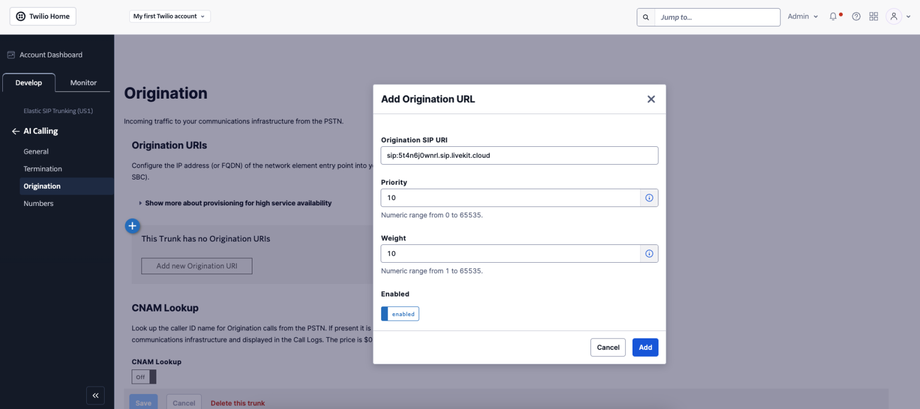
10. We are in the final inning! Ok, now - to set up inbound automation, (after saving your work) we need to go to Origination right underneath where we clicked on Termination. We just need to add a link here. Cool? Add a new Origination URI, add our origination URI and good to go:
Origination URI (For you to copy): sip:5t4n6j0wnrl.sip.livekit.cloud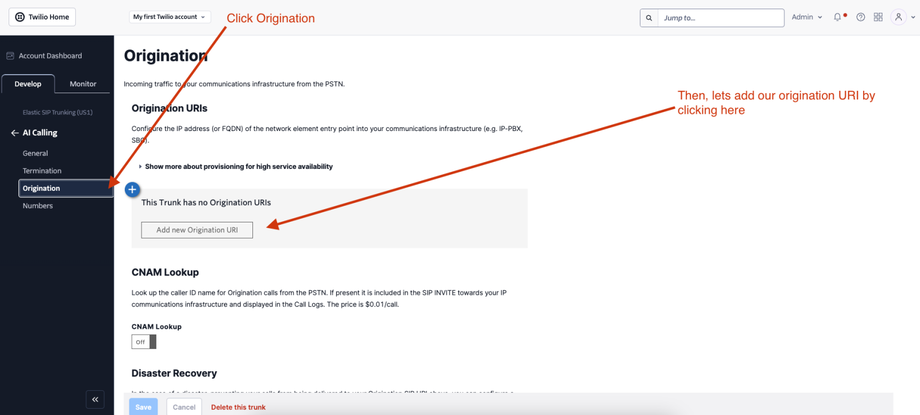
Next page please ⬇️
Guess what? We are done with the hard part. And this is the only time you will have to do this! Now we can go to the Number tab and bring in a number we already use and / or buy numbers in this “environment” and these will be accessible by the voice AI when you import them to our system.
WAIT 🛑
One last thing to get you going.
Importing a number to use:
Ok, now you have your cool new AI calling trunk to put numbers. So, in the top right corner, click on “Add a number” and either buy a number or add an existing number. Hint hint - if you buy a number you still need to click on add existing to add it to this trunk.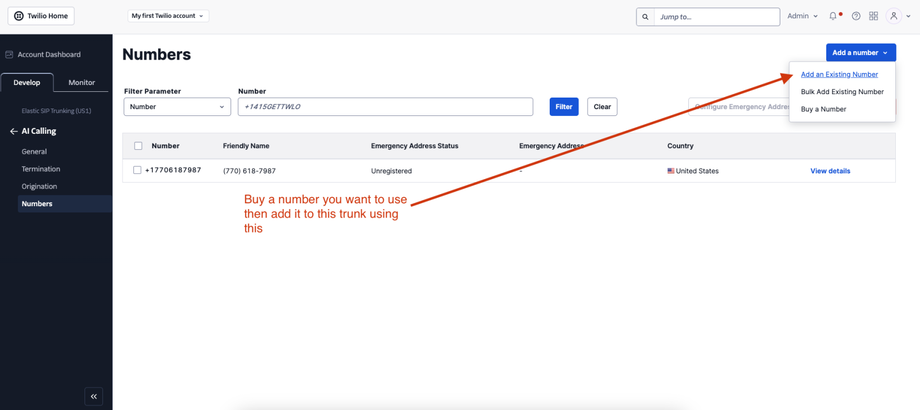
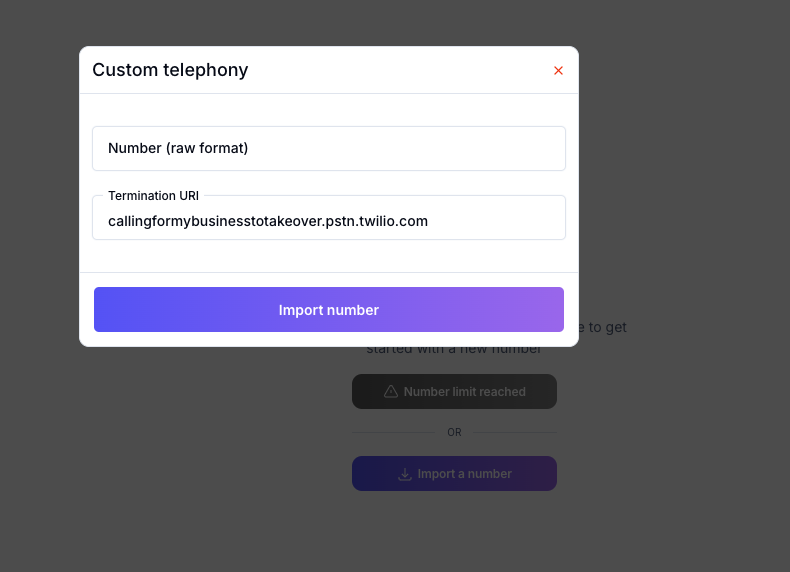
We need the number in raw format (+country code, then number with no space, no special characters) and your termination URI. Remember that from earlier? We need these two things to import our number into the system. Get those and move to the next steps.
Next Step please ⬇️
1. Go to your AI portal and navigate to the number tag in the main navigation or within an assistant - then click on import a number: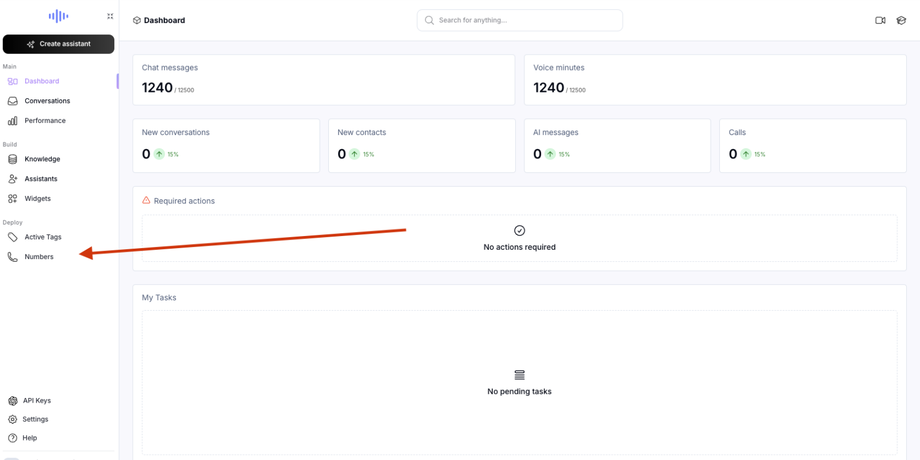
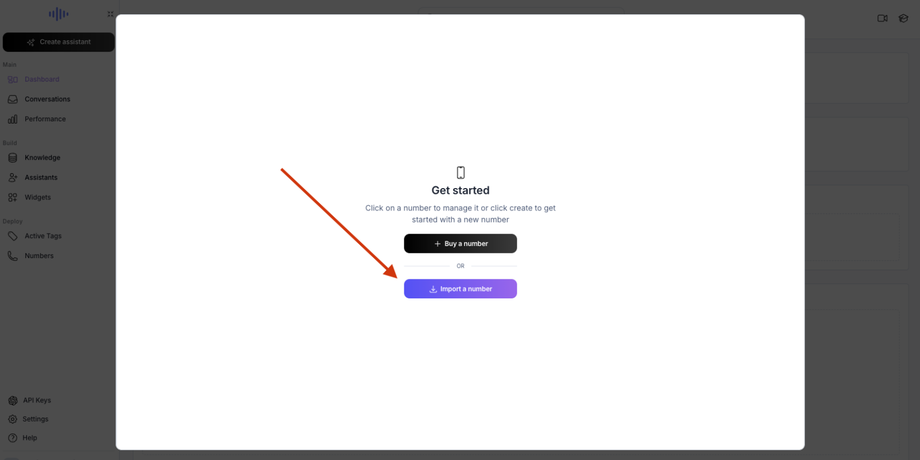
2. Input your raw formatted number (+country code, then number with no space, no special characters) and your termination URI - then click import: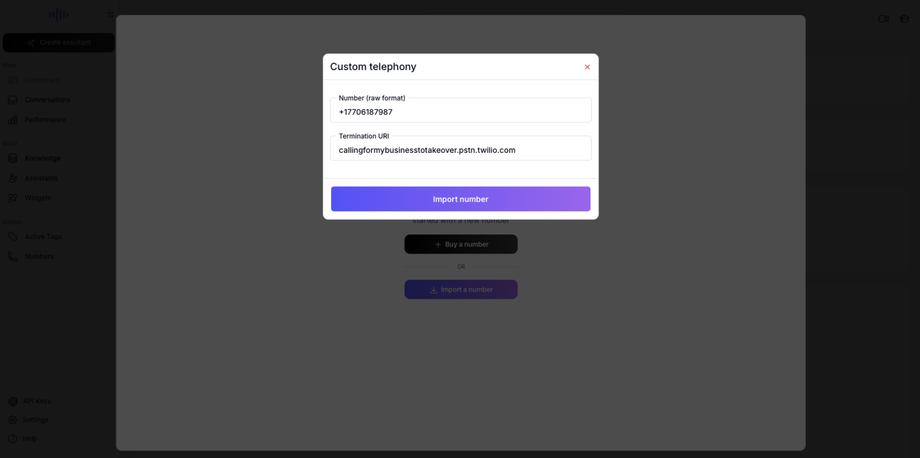
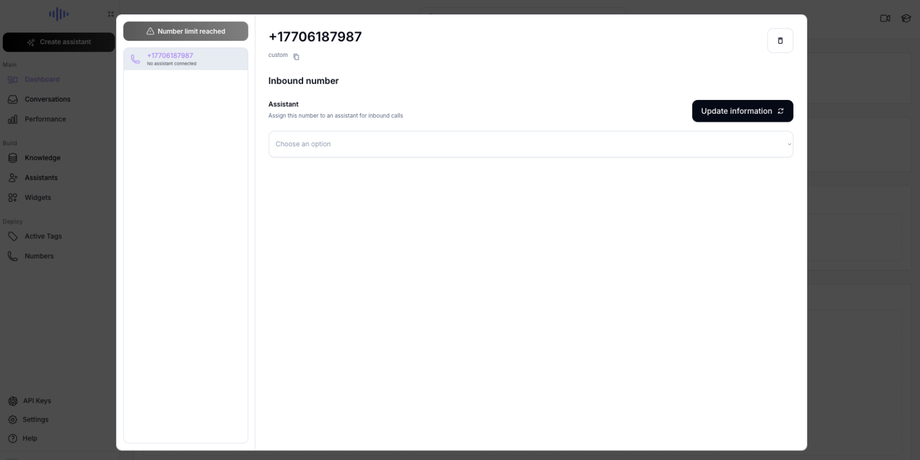
3. Then you are good to sync it with your assistants and make outbound calls / receive inbound calls for the AI to pick up from that number. We will save your termination URI for you so you don’t have to remember it everytime, just bring the number over.